The Following Instructions for removing a Dryer Front Panel May differ from model to model.
First Disconnect Power
 Pull Dryer away from wall to give access.
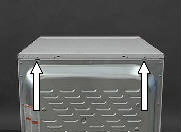
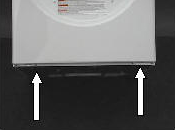
Then you should see two screws located at back top of dryer (As seen in photo)
Remove these two screws.
Now you will be able to grab the top by the sides and push back panel slightly and lift off.
 Now that the top is off
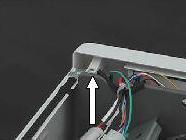
This allows access to the two screws holding your front console on.
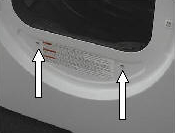
At the top usually one on each upper corner you will see a screw. (As seen in photo)
Before removing these screws take a photo of wiring on the back then remove screws.
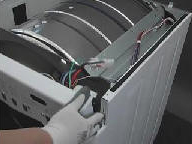 If you are removing the console unplug any connectors make sure to have good photo of the wiring.
Now remove the console.
Usually, enough wire to swing out of the way if not removing completely.
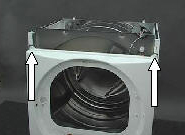 This will give you access to the 2 top screws of the front panel. As seen in photo.
Do not remove these screws yet we will come back to them.
 Best to remove the 2 screws at the bottom of the dryer front panel. You might need to prop up the dryer to get
access.
Best to remove the 2 screws at the bottom of the dryer front panel. You might need to prop up the dryer to get
access.
 Next there are usually 2 screws located behind the door on the front panel.
Remove these 2 screws.
Photograph connector at door switch and light.
Now remove the 2 top screws exposed earlier. Hold the front panel in place as you remove these screws.
Slowly tilt the panel forward and unplug remaining connectors.
Panel is now removed. The tub is now easily moved so be careful it can fall out on some models.